Many thanks to the lovely Merisa Coertze for allowing me to use her photo for this demonstration.
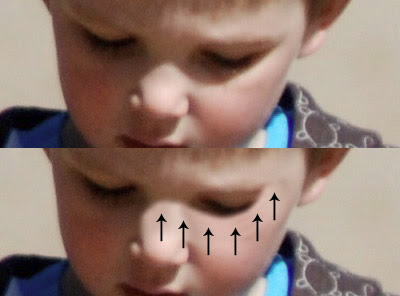
Here we have a cute photo of boys being boys. And bright sun being bright sun, there are some very hard shadows on various parts of the photo.

Photoshop gives us dozens of ways to perform any task, of course, so here is just one method for softening these shadows a little.
First, I made a new blank layer:
Then I set the Clone Tool to "Sample all layers" and cloned the bright skin up over some of the shadowed skin. You can see it's not particularly good cloning - there's obvious repetition of detail - but that doesn't matter:
Then I added a "Hide All" (black) mask to that layer. (Elements users will need a simple workaround for this, of course):
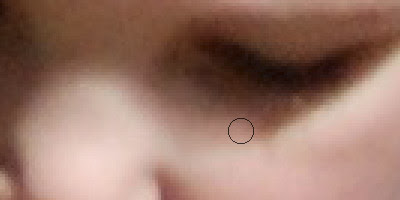
I chose my Brush Tool, made sure I was painting with white, and set the opacity of my brush to 5%. (10% probably would have worked ok too. Any higher than that, though, and your brush strokes start to become too aggressive and obvious):

Little by little, I painted over the edge of the shadow. (I use a graphics tablet, which is great for this kind of work. A mouse can serve, though). I painted most frequently near the edge of the shadow, and gradually blended it upwards. I varied my brush size a bit (using the [ and ] keys), but never went too big:
And here is the finished result (before and after):
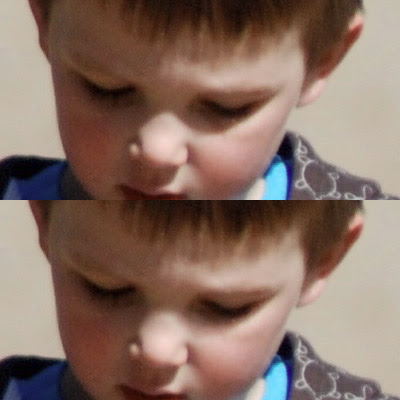
The intention is not to remove the shadows altogether. That would be extremely painstaking, and ultimately maybe impossible to do properly. This method simply softens the shadows to make them seem less harsh.
 Photoshop gives us dozens of ways to perform any task, of course, so here is just one method for softening these shadows a little.
First, I made a new blank layer:
Photoshop gives us dozens of ways to perform any task, of course, so here is just one method for softening these shadows a little.
First, I made a new blank layer:
 Then I set the Clone Tool to "Sample all layers" and cloned the bright skin up over some of the shadowed skin. You can see it's not particularly good cloning - there's obvious repetition of detail - but that doesn't matter:
 Then I added a "Hide All" (black) mask to that layer. (Elements users will need a simple workaround for this, of course):
 I chose my Brush Tool, made sure I was painting with white, and set the opacity of my brush to 5%. (10% probably would have worked ok too. Any higher than that, though, and your brush strokes start to become too aggressive and obvious):
 Little by little, I painted over the edge of the shadow. (I use a graphics tablet, which is great for this kind of work. A mouse can serve, though). I painted most frequently near the edge of the shadow, and gradually blended it upwards. I varied my brush size a bit (using the [ and ] keys), but never went too big:
 And here is the finished result (before and after):
 The intention is not to remove the shadows altogether. That would be extremely painstaking, and ultimately maybe impossible to do properly. This method simply softens the shadows to make them seem less harsh.