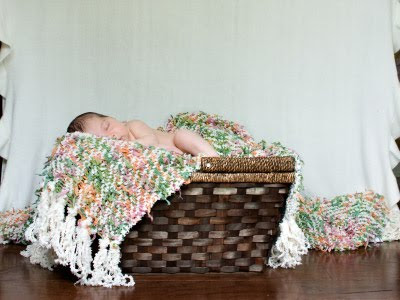
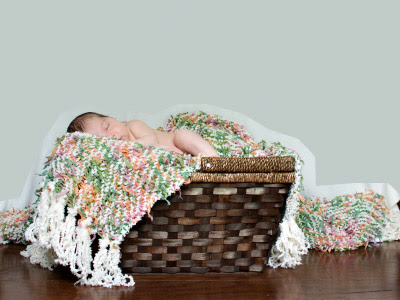
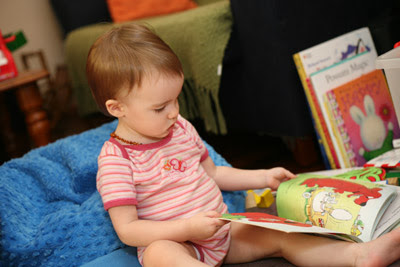
The lovely Sara W asked how she could blur the backdrop on this photo to disguise the texture and wrinkles:
Sara, sorry it's taken me so long to address this.
If you really want to blur it, then you'll need to follow the cloning/blurring method in the
Fake depth-of-field method I described recently.
However, for something like this, I find it easier to simply replace the background with a plain colour.
First, do all your normal editing. This method is best done last, and at the top of your layer stack (or even after flattening, if you prefer). Then proceed ...
THE INITIAL STUFF
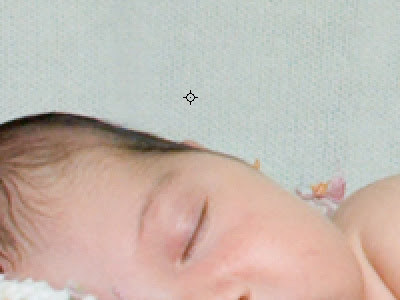
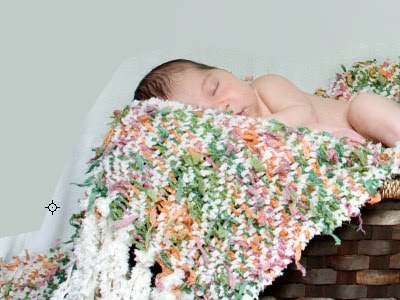
Use your eyedropper to take a desirable colour sample from a bit of background close to the subject:
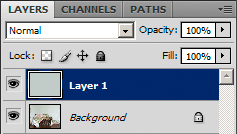
Then, make a new blank layer, and fill it with that colour:
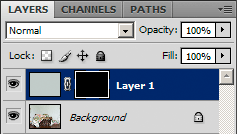
Immediately add a hide-all (black) layer mask to the layer:
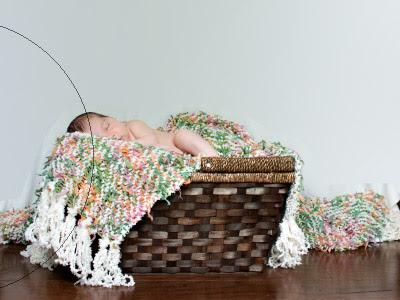
Use your Lasso Tool to select the background, but leave a small amount of room around the subject, as I've done here:

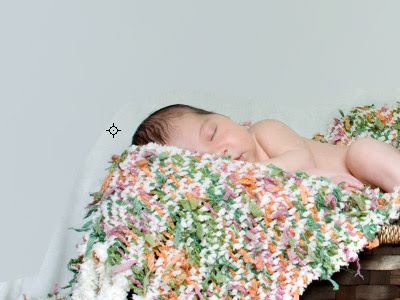
Fill that selected area with white on the mask, to reveal the plain background:

At this point, you could change the colour of the background (using Hue/Sat or whatever) if it didn't quite suit you. But be warned - the further you move the colour from the original colour that you sampled with your eyedropper, the harder the masking will be in the next steps.
A FORK IN THE ROAD
At this point, you have two choices:
1. Go with a completely plain-coloured background (which you already have); or
2. Subtly adjust the tones of the background to partially mimic the original.
Option (1) seems easier at first glance, but that's not always the case. If the original background in your photo varies in colour or brightness across its width, it requires much more painstaking masking to achieve a satisfactorily-blended result.
Whereas if you adjust the background in Option (2), the masking is a piece of cake.
Let's take a look at both ...
Option 1 - Plain Background
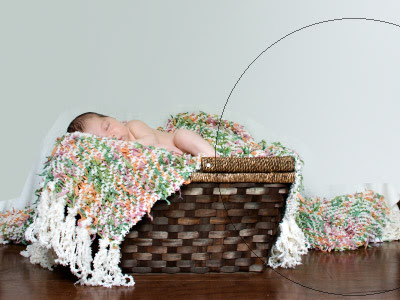
Zoom in and paint with white on the mask around the edges of the subject, to merge the new background. (As I've said before, this kind of work is easier with a graphics tablet than a mouse.) Don't forget to zoom out every now and then to make sure you're not missing any parts.
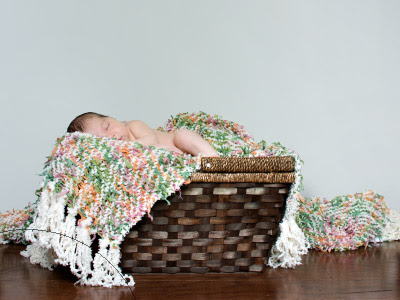
And here's the result. Quite satisfactory in this case:
 Option 2 - Adjusted Background
We're going to paint here and there on the new background, to make it tonally mimic the original a bit more.
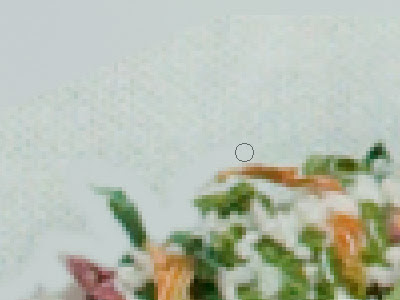
Look for areas where the underlying background differs significantly from the new background, such as on the right-hand side of this particular photo.
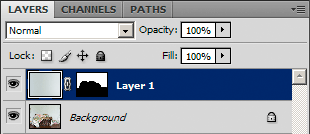
Click on the layer icon itself in the Layers Palette, instead of the mask icon. We want to paint on the layer, not the mask, at this stage:
Take an eye-dropper sample from the area:

Then choose the biggest brush you dare, and paint on the new background in that area. This will gently adjust the new background to more closely match the old background. As I said earlier, this will make masking easier shortly:
Here, I sampled another area on the left side ...
... and painted. Of course, there are some wrinkles that are still going to require a bit of careful masking, but that's life.
One more sample from an area of differing colour ...
... and one more brush:

When you look at the above image, you can see how the two backgrounds are much closer in colour and tone, which will make masking a breeze. Compare that to how it was before ...
... and you can see the differences that existed. Those differences mean that your masking work has to be very precise to avoid any visible "halos" around your subject.
Ok, from here, it's easy. Just select the mask again ...

... zoom in and paint ...

... until you get this:

Sometimes, at the end, I modify a little by adding a bit of "fake shadowing" in some parts. Painting with a low-opacity black brush on the layer (not the mask) does the trick.
Lastly (this is important!) it's a very good idea to add a low amount of noise to the new background. Too-smooth backgrounds can exhibit banding either on your screen, or in print. 1 or 2% of noise eliminates this problem.
Here's the result - before and after. (Sorry about the dotty gif file!)

Here's another one I did. Here's the original:
And here's a fake background added:

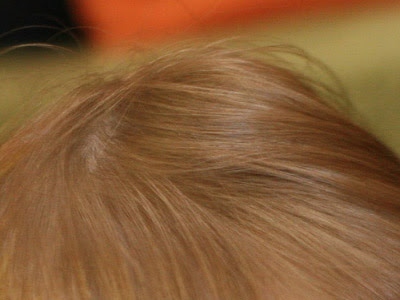
Here's a close-up of the hair before the edit:
And here's afterwards. I wasn't able to preserve every strand of hair from the original, but you'll agree that I was able to keep enough strands to look reasonably natural, and avoid that horrid "cardboard cutout" look. That's the big benefit of this method.

 Sara, sorry it's taken me so long to address this.
If you really want to blur it, then you'll need to follow the cloning/blurring method in the Fake depth-of-field method I described recently.
However, for something like this, I find it easier to simply replace the background with a plain colour.
First, do all your normal editing. This method is best done last, and at the top of your layer stack (or even after flattening, if you prefer). Then proceed ...
THE INITIAL STUFF
Use your eyedropper to take a desirable colour sample from a bit of background close to the subject:
Sara, sorry it's taken me so long to address this.
If you really want to blur it, then you'll need to follow the cloning/blurring method in the Fake depth-of-field method I described recently.
However, for something like this, I find it easier to simply replace the background with a plain colour.
First, do all your normal editing. This method is best done last, and at the top of your layer stack (or even after flattening, if you prefer). Then proceed ...
THE INITIAL STUFF
Use your eyedropper to take a desirable colour sample from a bit of background close to the subject:
 Then, make a new blank layer, and fill it with that colour:
 Immediately add a hide-all (black) layer mask to the layer:
 Use your Lasso Tool to select the background, but leave a small amount of room around the subject, as I've done here:
 Fill that selected area with white on the mask, to reveal the plain background:

 At this point, you could change the colour of the background (using Hue/Sat or whatever) if it didn't quite suit you. But be warned - the further you move the colour from the original colour that you sampled with your eyedropper, the harder the masking will be in the next steps.
A FORK IN THE ROAD
At this point, you have two choices:
1. Go with a completely plain-coloured background (which you already have); or
2. Subtly adjust the tones of the background to partially mimic the original.
Option (1) seems easier at first glance, but that's not always the case. If the original background in your photo varies in colour or brightness across its width, it requires much more painstaking masking to achieve a satisfactorily-blended result.
Whereas if you adjust the background in Option (2), the masking is a piece of cake.
Let's take a look at both ...
Option 1 - Plain Background
Zoom in and paint with white on the mask around the edges of the subject, to merge the new background. (As I've said before, this kind of work is easier with a graphics tablet than a mouse.) Don't forget to zoom out every now and then to make sure you're not missing any parts.
At this point, you could change the colour of the background (using Hue/Sat or whatever) if it didn't quite suit you. But be warned - the further you move the colour from the original colour that you sampled with your eyedropper, the harder the masking will be in the next steps.
A FORK IN THE ROAD
At this point, you have two choices:
1. Go with a completely plain-coloured background (which you already have); or
2. Subtly adjust the tones of the background to partially mimic the original.
Option (1) seems easier at first glance, but that's not always the case. If the original background in your photo varies in colour or brightness across its width, it requires much more painstaking masking to achieve a satisfactorily-blended result.
Whereas if you adjust the background in Option (2), the masking is a piece of cake.
Let's take a look at both ...
Option 1 - Plain Background
Zoom in and paint with white on the mask around the edges of the subject, to merge the new background. (As I've said before, this kind of work is easier with a graphics tablet than a mouse.) Don't forget to zoom out every now and then to make sure you're not missing any parts.
 And here's the result. Quite satisfactory in this case:
 Option 2 - Adjusted Background
We're going to paint here and there on the new background, to make it tonally mimic the original a bit more.
Look for areas where the underlying background differs significantly from the new background, such as on the right-hand side of this particular photo.
Click on the layer icon itself in the Layers Palette, instead of the mask icon. We want to paint on the layer, not the mask, at this stage:
Option 2 - Adjusted Background
We're going to paint here and there on the new background, to make it tonally mimic the original a bit more.
Look for areas where the underlying background differs significantly from the new background, such as on the right-hand side of this particular photo.
Click on the layer icon itself in the Layers Palette, instead of the mask icon. We want to paint on the layer, not the mask, at this stage:
 Take an eye-dropper sample from the area:
 Then choose the biggest brush you dare, and paint on the new background in that area. This will gently adjust the new background to more closely match the old background. As I said earlier, this will make masking easier shortly:
 Here, I sampled another area on the left side ...
 ... and painted. Of course, there are some wrinkles that are still going to require a bit of careful masking, but that's life.
 One more sample from an area of differing colour ...
 ... and one more brush:
 When you look at the above image, you can see how the two backgrounds are much closer in colour and tone, which will make masking a breeze. Compare that to how it was before ...
 ... zoom in and paint ...
 ... until you get this:
 Sometimes, at the end, I modify a little by adding a bit of "fake shadowing" in some parts. Painting with a low-opacity black brush on the layer (not the mask) does the trick.
 Lastly (this is important!) it's a very good idea to add a low amount of noise to the new background. Too-smooth backgrounds can exhibit banding either on your screen, or in print. 1 or 2% of noise eliminates this problem.
Here's the result - before and after. (Sorry about the dotty gif file!)
Lastly (this is important!) it's a very good idea to add a low amount of noise to the new background. Too-smooth backgrounds can exhibit banding either on your screen, or in print. 1 or 2% of noise eliminates this problem.
Here's the result - before and after. (Sorry about the dotty gif file!)
 And here's a fake background added:
 Here's a close-up of the hair before the edit:
 And here's afterwards. I wasn't able to preserve every strand of hair from the original, but you'll agree that I was able to keep enough strands to look reasonably natural, and avoid that horrid "cardboard cutout" look. That's the big benefit of this method.
