This is such a great tip, I can't believe I didn't think to write it before! Sorry Elements users, this one isn't for you.
A "Luminosity Selection" is the ability to make a selection based on the lightness/darkness of the tones in your image. The brighter the pixel, the more distinctly it's selected.
Up to Photoshop CS3, a luminosity selection was created by holding down Ctrl, Shift and Alt (Cmd-Shift-Option on Macs, I guess) and pressing the ~ key (that's the one at the top left of your keyboard). From CS4, it was changed to Ctrl-Shift-Alt-2 (not F2, just plain 2).
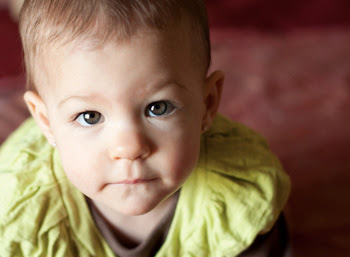
Here's a photo:
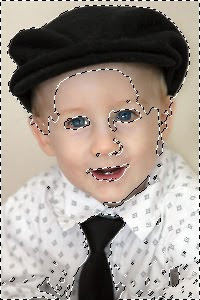
 And here's its luminosity selection. The marching ants show the lighter areas selected, and the darker areas not:
 "So what?" you say. Well, once you have that selection, all sorts of artistic fun is possible. For example, make a Solid Color adjustment layer, and immediately the selection becomes the layer mask ...
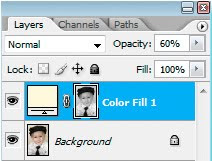 ... and you can add a soft pale yellow tone to the highlights of your image:
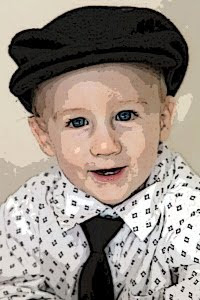
 Or, what about this? Duplicate the layer and run an artistic filter on it ...
 ... then use a luminosity mask to apply that filter only to the highlights:
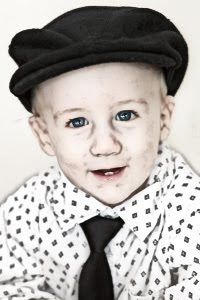 Here's another one. Layer filtered ...
 ... then applied only to the shadows, not the highlights:
 Ok, play time is over, children. How can this be used in day-to-day retouching? As a damn good substitute for the destructive Shadow/Highlight filter, that's how.
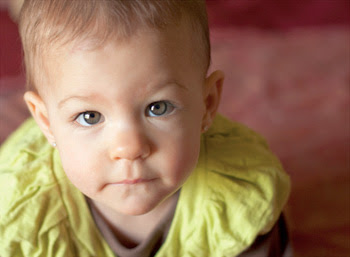
Here's a photo with distinct shadow areas (thanks to Janeal from Utah for permission to play with this beautiful photo). I want to even out those tones.
Ok, play time is over, children. How can this be used in day-to-day retouching? As a damn good substitute for the destructive Shadow/Highlight filter, that's how.
Here's a photo with distinct shadow areas (thanks to Janeal from Utah for permission to play with this beautiful photo). I want to even out those tones.
 First, I make a luminosity selection. This selects the highlight areas:
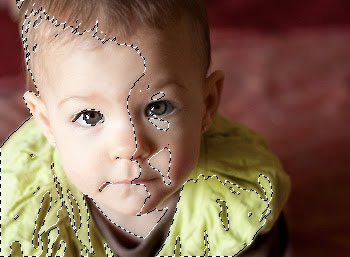 I want to edit the shadow areas, so I choose "Inverse" from the Select menu to select dark areas instead:
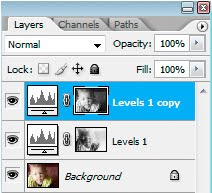
 Then I make a Levels layer ...
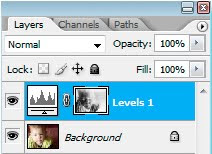 ... and brighten the midtones to open up the darker areas:
 That's gorgeous, but I can go one better. If I want to add a bit of strength to the very light areas, I simply duplicate that Levels layer, and invert the mask (Ctrl I) ...
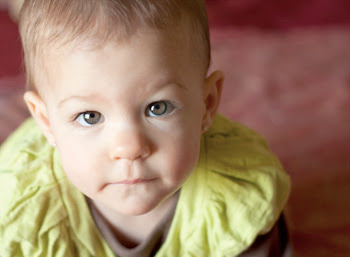
 ... then darken the midtones a little to boost those tones:
 Just in case you'd forgotten, here's what the original looked like:
Of course, further masking can be done to control which parts of the photo get this luminosity-based treatment. This kind of approach is a zillion times better than the Shadow/Highlight feature, which isn't available in a layer-based non-destructive form.
Luminosity selections have unlimited potential. Ever noticed how noise is a worse problem in shadow areas than highlight areas? Mask your noise reduction layer using a luminosity mask. What about adding a texture only to shadow areas? How about saturating bright areas more than dark areas?
You won't use luminosity selections every day, or even every other day. But you'll love them when you do!
Just in case you'd forgotten, here's what the original looked like:
Of course, further masking can be done to control which parts of the photo get this luminosity-based treatment. This kind of approach is a zillion times better than the Shadow/Highlight feature, which isn't available in a layer-based non-destructive form.
Luminosity selections have unlimited potential. Ever noticed how noise is a worse problem in shadow areas than highlight areas? Mask your noise reduction layer using a luminosity mask. What about adding a texture only to shadow areas? How about saturating bright areas more than dark areas?
You won't use luminosity selections every day, or even every other day. But you'll love them when you do!
 And here's its luminosity selection. The marching ants show the lighter areas selected, and the darker areas not:
 "So what?" you say. Well, once you have that selection, all sorts of artistic fun is possible. For example, make a Solid Color adjustment layer, and immediately the selection becomes the layer mask ...
 ... and you can add a soft pale yellow tone to the highlights of your image:
 Or, what about this? Duplicate the layer and run an artistic filter on it ...
 ... then use a luminosity mask to apply that filter only to the highlights:
 Here's another one. Layer filtered ...
 ... then applied only to the shadows, not the highlights:
 Ok, play time is over, children. How can this be used in day-to-day retouching? As a damn good substitute for the destructive Shadow/Highlight filter, that's how.
Here's a photo with distinct shadow areas (thanks to Janeal from Utah for permission to play with this beautiful photo). I want to even out those tones.
Ok, play time is over, children. How can this be used in day-to-day retouching? As a damn good substitute for the destructive Shadow/Highlight filter, that's how.
Here's a photo with distinct shadow areas (thanks to Janeal from Utah for permission to play with this beautiful photo). I want to even out those tones.
 First, I make a luminosity selection. This selects the highlight areas:
 I want to edit the shadow areas, so I choose "Inverse" from the Select menu to select dark areas instead:
 Then I make a Levels layer ...
 ... and brighten the midtones to open up the darker areas:
 That's gorgeous, but I can go one better. If I want to add a bit of strength to the very light areas, I simply duplicate that Levels layer, and invert the mask (Ctrl I) ...
 ... then darken the midtones a little to boost those tones:
 Just in case you'd forgotten, here's what the original looked like:
Of course, further masking can be done to control which parts of the photo get this luminosity-based treatment. This kind of approach is a zillion times better than the Shadow/Highlight feature, which isn't available in a layer-based non-destructive form.
Luminosity selections have unlimited potential. Ever noticed how noise is a worse problem in shadow areas than highlight areas? Mask your noise reduction layer using a luminosity mask. What about adding a texture only to shadow areas? How about saturating bright areas more than dark areas?
You won't use luminosity selections every day, or even every other day. But you'll love them when you do!
Just in case you'd forgotten, here's what the original looked like:
Of course, further masking can be done to control which parts of the photo get this luminosity-based treatment. This kind of approach is a zillion times better than the Shadow/Highlight feature, which isn't available in a layer-based non-destructive form.
Luminosity selections have unlimited potential. Ever noticed how noise is a worse problem in shadow areas than highlight areas? Mask your noise reduction layer using a luminosity mask. What about adding a texture only to shadow areas? How about saturating bright areas more than dark areas?
You won't use luminosity selections every day, or even every other day. But you'll love them when you do!